MAGNETIC NORTH
Basically, the magnetized needle or dial of a compass always points to Magnetic North because it is aligning itself with the magnetic lines of flux that extend from the Antarctic to Northern Canada. Because the north magnetic pole is not at the North Pole, a compass will not always point to true north when used in different parts of the United States. Referring to Figure 1, you can see that a compass will only point to true north (the North Pole) if it is used anywhere on the line that extends from Florida to upper Michigan. This is called the zero declination or variation line. It is along this line that the magnetic pole and the North Pole are aligned. As you head toward the East coast, your compass will point more and more West of the North Pole.
Conversely, as you head toward the West coast, your compass will point East of true North. This magnetic declination will become very important as you study how to read a map. For now, just remember that depending upon where you live, your compass may not be pointing at true North.
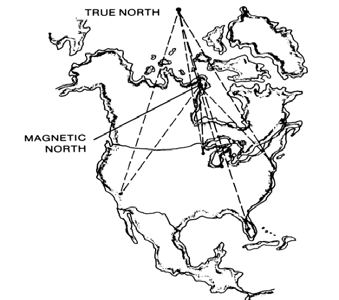
Figure 1
CARDINAL POINTS
To aid in navigation, early compasses were first marked with the cardinal points: North, South, East and West. Later the semicardinal points were added: Northeast, Southeast, Southwest, Northwest. As the need for more accurate navigation arose, eight “combination points” and sixteen “by- points” were added. When sailing ships gave way to steam power, the compass was further subdivided into half-points and quarter-points. The resulting system became so complicated that it was discarded and the present degree compass measure was adopted.
DEGREE SYSTEM
In the degree system, the compass circle is divided into 360 divisions called Degrees. North is located at the 0 or 360 degree mark. East is at 90 degrees, South at 180 degrees and west at 270 degrees. It is much easier to understand a course of 14 degrees than one set at “N by E, quarter E.”
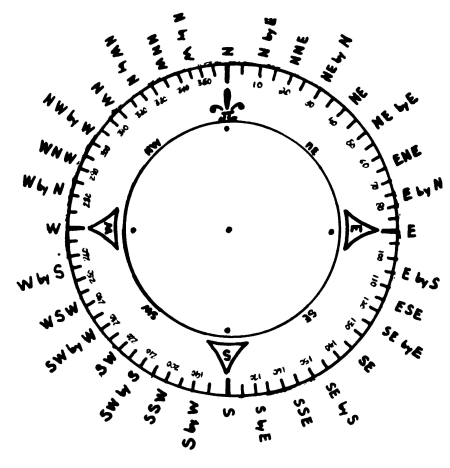
Figure 2
Today, the 32-point compass is of little interest beyond that of history. The “point” is still used on some nautical charts and it means 1/32 of the compass circle or 11.25 degrees.
COMPASS STYLES
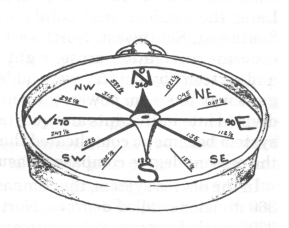
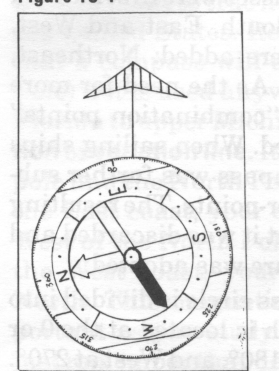
The modern hand held compass comes in two basic styles: floating needle and floating card. Figure 3 shows a needle compass that is very popular for orienteering. The card compass, or sighting compass, as it is sometimes called, is shown in Figure 4 and is used by Pioneers. It is more accurate.
USE
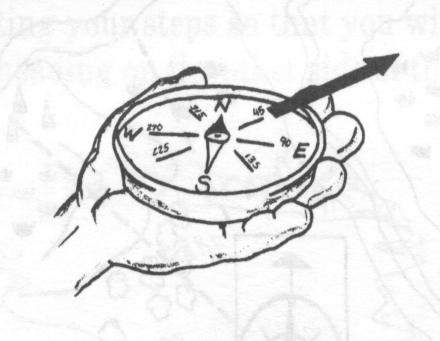
A compass is an instrument that does just one thing: it points to the magnetic North. It does not keep you on your course automatically nor does it guide you back to your campsite. You must learn how to use it properly.
To use the orienteering compass, point the compass
in the direction that you want to go. When the needle has stopped moving, align the orienteering arrow and the compass needle. The direction of travel arrow will now indicate the Azimuth or bearing that you must travel to reach your goal.
Figure
5
With a card type compass, point it in the direction you want to travel and the compass heading or azimuth will automatically line up with your target (see Figure 6). As with the needle type compass, allow the needle to stop moving before taking your readings.
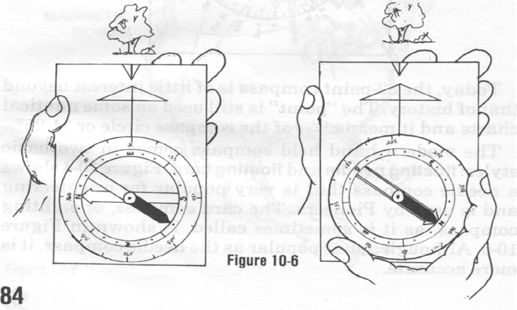
There is a phrase that will help you remember how to use your compass. It works for either type but best with the card type of compass. The phrase is, “Put Red in the Shed and follow Fred.” You begin by naming the direction you want to go (on the card it is your direction arrow) “Fred.” Secondly you hold the compass in front of you and then turn your body until the “Red” arrow on the compass (which always points north) is inside the arrow outline (“Shed”) on your compass face. Then you follow “Fred” to where you want to go.
One common source of error when using a hand held compass is the influence of nearby ferrous metal. Since the needle or card is magnetized, it will be attracted to any nearby iron object. This is called deviation. When sighting your compass, keep it away from your belt buckle, metal posts, other compasses, etc.
No matter which compass you use, once you have your bearing, look for a prominent landmark (such as a tall tree) and hike to it. In this way it is not necessary for you to constantly refer to your compass as you walk. Once you reach this landmark, take another bearing toward another prominent landmark. You can repeat this procedure until you arrive at your destination.
DELIBERATE ERROR
Sometimes when you are traveling through deep woods, it is better not to try and hit a small target such as your camp, but to hit a large target such as a nearby lake, from which your camp can easily be found. Another time your camp might be located on a river that runs in just one direction. If you were to head directly for your camp, you might miss it and then not know whether you were upstream or downstream from your camp. In either of these situations the solution is to deliberately miss your camp by walking too far to the left or too far to the right. This is called deliberate error or aiming off. In the second example, if you aimed to the right of your camp, when you reached the river, you would just turn left and follow it to your tent (see Figure 7).
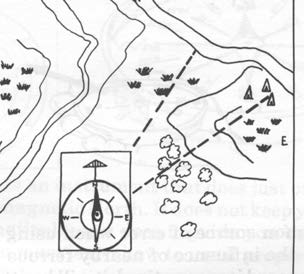
Figure 7
TRIANGULATION
If you were out on a lake fishing and wanted to return to the same spot the next day, you could find it again with your compass by using a method called triangulation. Take a compass bearing of two prominent landmarks before you leave your favorite fishing hole. Those two bearings will only cross at one point on the lake. The next day it is just a matter of locating one of the bearings and paddling along that line to find the other bearing. This works just as well on land too. Study Figure 8 and see if you can do it.
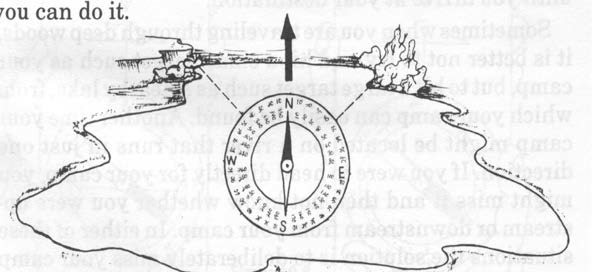
Figure 8
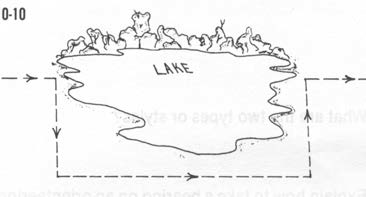
Figure 9
TRAVELING AROUND AN OBSTACLE
If, while hiking through the
woods on a bearing you come to an obstacle such as a lake, just spot a landmark
on the other side, walk around the lake to the landmark and resume your
bearings. If you can’t see across the obstacle, you will have to lay out a course
around it. Practice going around an obstacle by studying Figure 9. Once you
leave your original heading, don’t forget to begin counting your steps so that
you will end up on your original heading on the other side of the obstacle.
BACK AZIMUTH
If you ever need to back track along a bearing, you can do this by following what is called a back azimuth. Looking at your compass, you will notice that South is 180 degrees away from North. This is true for all of the compass directions. If you hiked for one mile at 45 degrees, the return trip would be one mile at 225 degrees. Refer to Figure 10 for an example of back azimuth.
Remember that a compass only tells you one thing: which way is North.
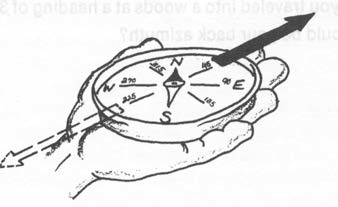
Figure 10
This is the basic information needed to be able to use a compass effectively.