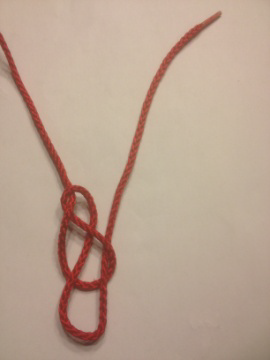
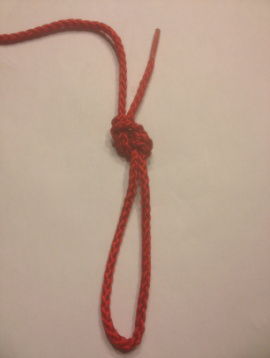
Stopper Knot
A stopper knot is tied at the end of a rope to prevent the end from unraveling, slipping through another knot, or passing back through a hole, block or a device.
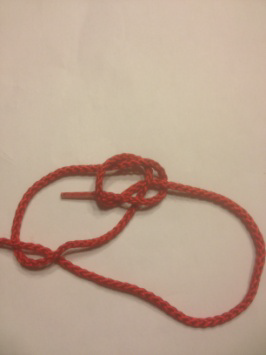
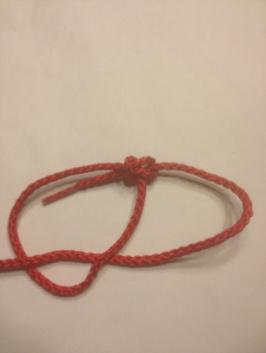
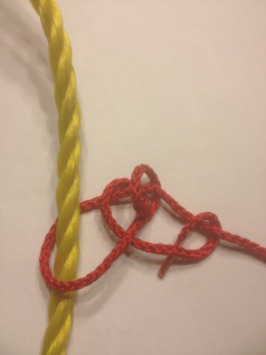
This version, the Ashley Stopper knot, also known as the Oysterman’s stopper, is a knot developed by Clifford Ashley around 1910. It makes a well-balanced trefoil-faced stopper at the end of the rope, giving greater resistance to pulling through an opening than other common stoppers. Essentially, the knot is a common Overhand noose, but with the end of the rope passing through the noose eye, which closes upon it.
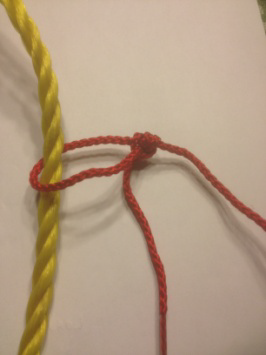
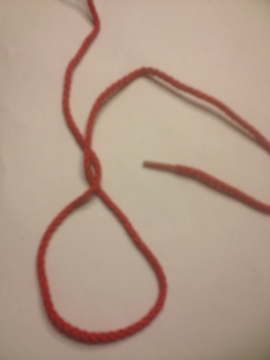
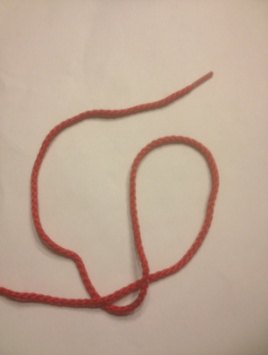
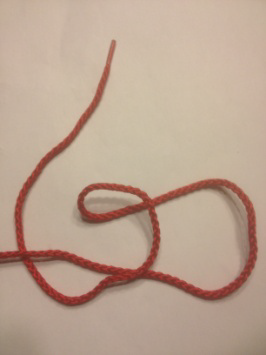
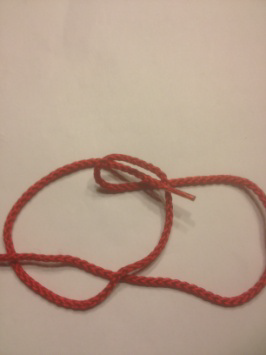
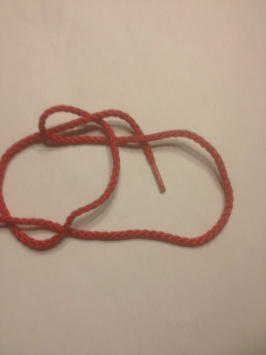
- Form a small loop at the end of a line by running tag end over standing line.
- Tie an overhand knot around standing line.
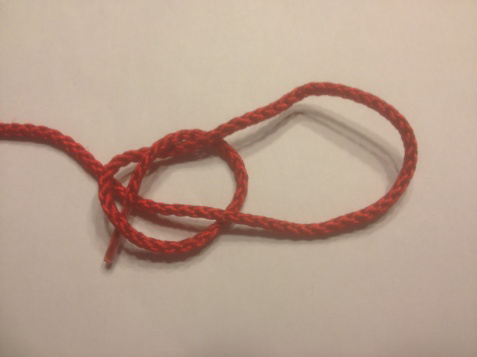
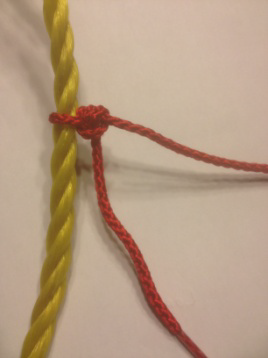
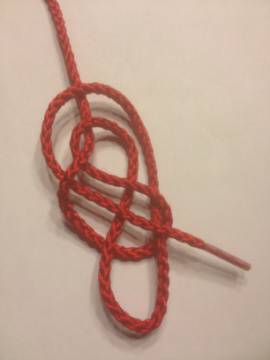
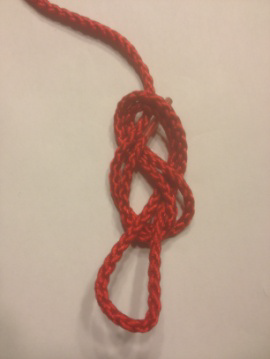
- Pull overhand knot tight and feed tag end through noose (loop) end.
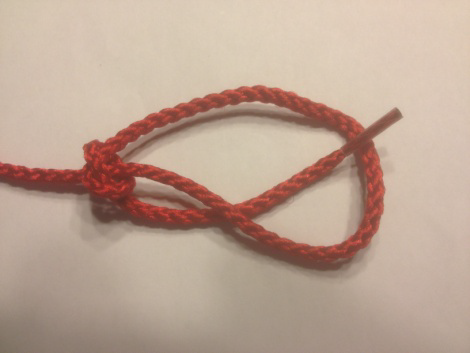
- Pull tag end all the way through and slide knot down tight.
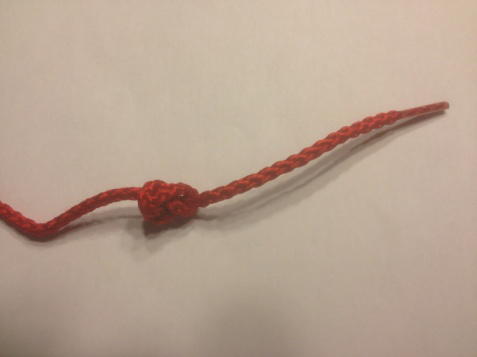
- Pull both ends tight.
Figure Eight
The figure eight follow through is one of the strongest knots. It forms a secure, non-slip loop at the end of a rope. Also known as the Flemish Bend, this is the most widely used tie-in knot by mountain climbers. The reason is that it is strong, secure and easy to visually inspect. Climbers often further secure it by tying a back up knot with the tag end.
The knot can also be tied by tying a Figure Eight Knot with doubled line at the end of a rope (Step 1, but don’t come back through the bottom loop). It is faster but cannot be used if tying into a fixed object, so it is good to learn to tie this knot as the “Figure Eight Follow Through”. A single Figure Eight also makes a good “Stopper Knot” at the end of a rope (Step 1 with the single line but don’t come back up through the bottom loop)
- Tie a single eight in the rope two feet from its end. Pass the free end through any tie-in point if desired.
- Retrace the original eight with the free end leaving a loop at the bottom of the desired size.
- Pull all four strands of rope to cinch down the knot.
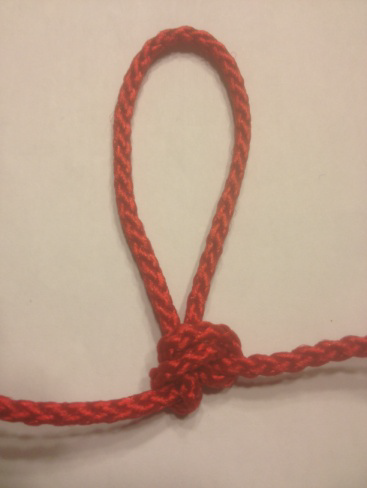
Butterfly Knot
Forms secure loop(s) in the middle of a rope. It will accommodate a load in any direction. Mountain climbers use the Butterfly Knot for tying-in the middle climber when traveling three to a rope. Also useful for making non-slip loops in the middle of a rope to attach carabiners to provide purchase points for a winch line – essential in canoe rescue work. It can take a load in any of the three directions, independently or together. The knot can also be used to isolate a damaged section of a rope.
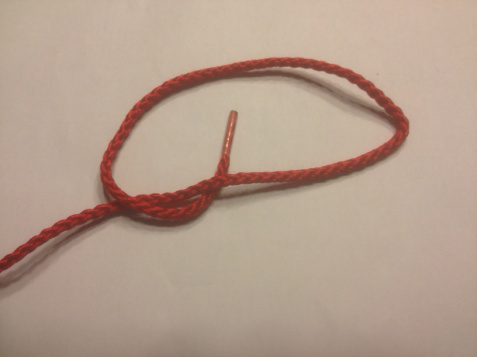
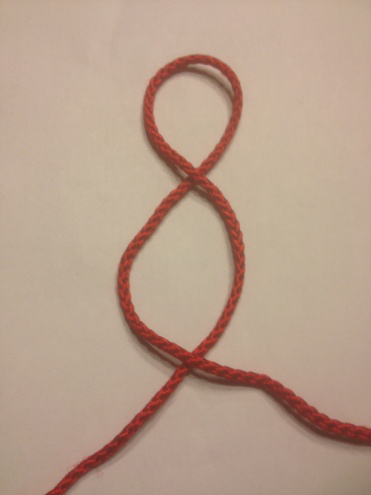
- Make a loop in the rope and twist it one full rotation into an eight shape.
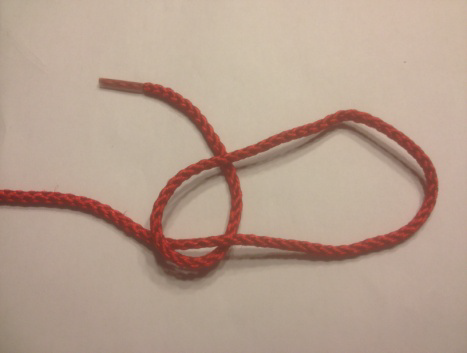
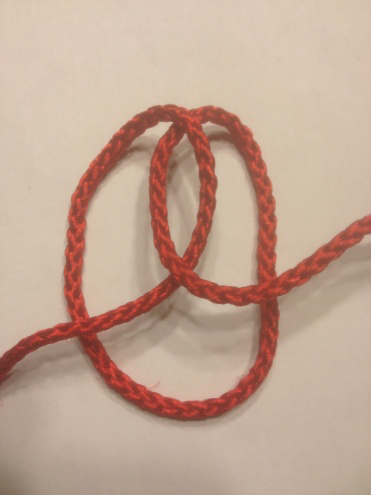
- Fold the top of the eight down around the bottom of the eight.
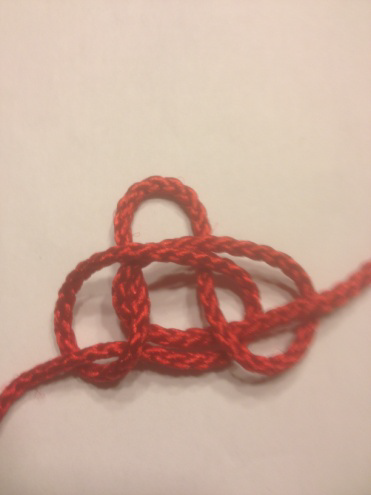
- Now up and out through the lower opening of the eight and pull tight.
Running Bowline
The Running Bowline produces a noose or sliding loop. This can be useful for retrieving objects by throwing the open loop around them and the loop will tighten down on the object, as the standing line is pulled tight. The knot does not bind against the standing line and can be easily undone.
- Double the end of a rope and wrap tag end over then understanding line and up to side of new loop created.
- Make a small loop on the topside of the original loop by twisting the line over itself.
- Feed tag end through the small loop.
- Wrap tag end once around topside of large loop and back down through small loop.
- Pull tag end tight creating fixed loop that the main line can slip through
Tautline Hitch
This knot can be slipped to tighten or loosen a line, then holds fast under load. Useful for lines that may need adjustment. The Tautline Hitch is essentially a Rolling Hitch tied on the standing part of a tight line after it has been secured around a object. Campers like to use this knot to secure tent guy lines because the hitch slides freely, yet jams under load, making adjustments to the line easy.
- Make a turn around a post or other object several feet from the free end.
- Coil the free end twice around the standing line working back toward the post.
- Make one additional coil around the standing line on the outside of the coils just made.
- Tighten the knot and slide it on the standing line to adjust tension.