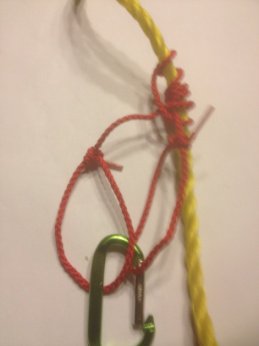
The Distel Hitch
The Distel Hitch is a very responsive friction knot popular with arborists. It tends not to jam or slip when set and dressed correctly. It can be used on main climbing line or on a work positioning strop. The Distel will only grip in one direction. If using a line without eyes you can tie a Double Fisherman’s at each end to attach to a carabiner. It is important to descend slowly to avoid friction damage to the distel cord!
- Make four wraps around main static rope with a hand tied or sewn prusik or spliced eye split tail friction cord.
- After fourth wrap bring wrapping tail down and make an additional wrap at bottom of other wraps in same direction while tying a half hitch by tucking tail under itself in the front of the knot.
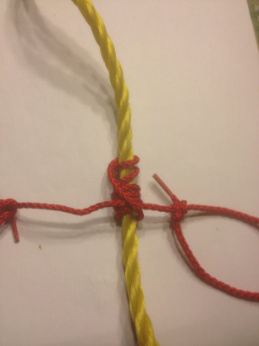
- Join eyes in front and clip together with a carabiner.
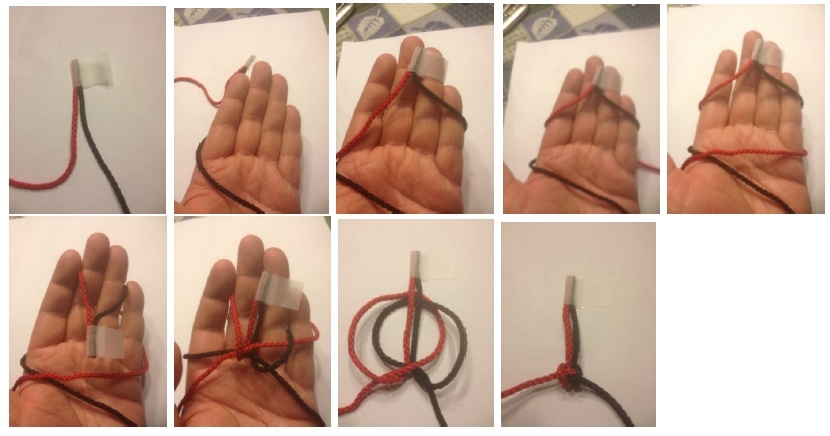
Alpine Butterfly Bend
It is one in a family of knots based on interlocking overhand knots. It is a reliable bend used to join two ropes of roughly similar size and can be untied even after being heavily loaded. The Alpine Butterfly Bend version enjoys a good reputation – probably because of its association with the better known Alpine Butterfly Loop
Join the two ends temporarily. Wind the rope around your hand so that the join is by your finger tips. Go around again. Fold the join back and then up under the other ropes. Push the knot off your hand and tighten to see the appearance of the Alpine Butterfly. Finally, release the temporary join.
Dropper loop
The Dropper Loop creates a loop that stands out at right angles to the middle of a length of line. It can be used in your leader or tippet to provide an extra attachment point for an additional fly. If desired the loop can be made long enough to set a hook directly on it. However, to minimize the risk of fouling and twisting this Dropper loop should not be too long. The Dropper knot is also used on multi-hook fishing lines.
Create a large loop in the middle of a line. Holding the center, wrap the loop around this crossover point about six times. Open a hole in the center and pass the loop through the hole. Lubricate, hold the loop with your teeth, and pull the knot tight. Note: in nylon tightening this knot alters the structure.
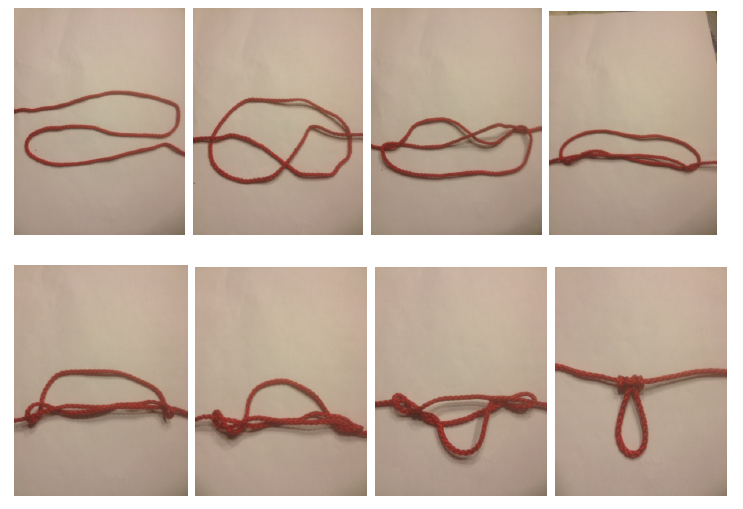
Figure 8 Follow though
The Figure 8 Follow Through allows the simple and reliable Figure 8 loop to be tied to a ring, a carabiner, or your own harness. It is reasonably easy to remember, tie, and check. When completed it forms a Figure 8 Loop.
Start by tying a loose Figure 8 knot. Pass the tail around the attachment point. Follow the original Figure 8 around the entire knot in reverse. Exit beside the standing end to complete a two stranded Figure 8 knot.
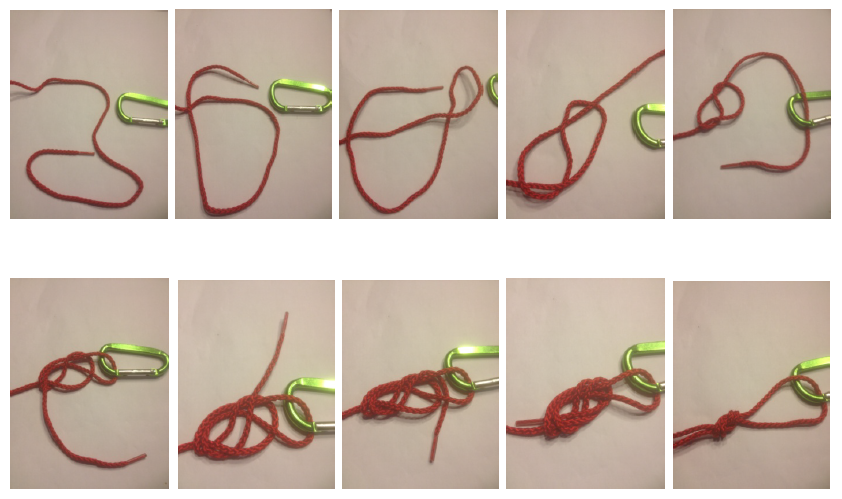
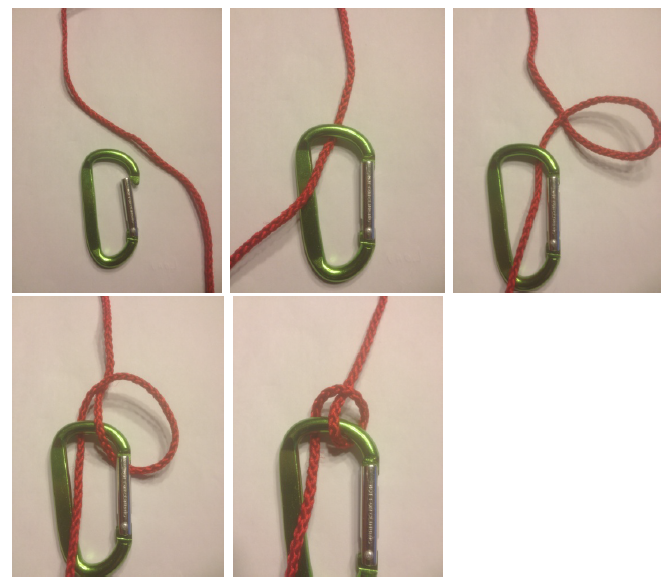
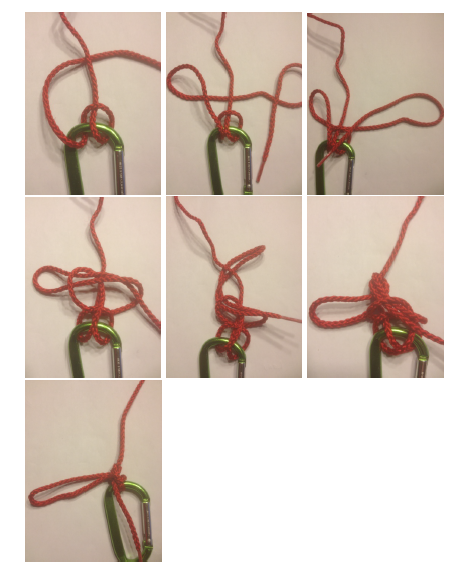
Munter Mule
Part 1: The Munter Hitch – (The first part is also known as the Italian Hitch), allows controlled descent when rappelling (abseiling). The climbing rope passes through a locking carabiner, round the rope, and back through the carabiner. For controlled descent, the brake hand need only apply relatively little force on the free end.
Requirements: Use a carabiner large enough to allow the hitch to be inverted through the carabiner when pulled. The load end should pass first round the spine side (not the opening side) of the carabiner. Then during descent, the rope will not chafe against the lock with the risk of opening it.
Part 2: Completing the Munter Mule you have add the Mule Hitch is used to secure the Munter. Using a bight of the rope, a Slip Knot followed by a Half Hitch is tied around the standing end. This final Half Hitch is essential because the weight of the hanging rope might otherwise easily undo the Slip Knot. When loaded, the Mule knot tends to slide down tight against the Munter and can be somewhat difficult to undo.
Pass the rope into the carabiner. Twist the rope above into a loop and hook it onto the carabiner to take the load. Create two loops and then, around the climbing rope, tie a slip knot leaving a long loop. Use it to tie a Half Hitch to secure the knot
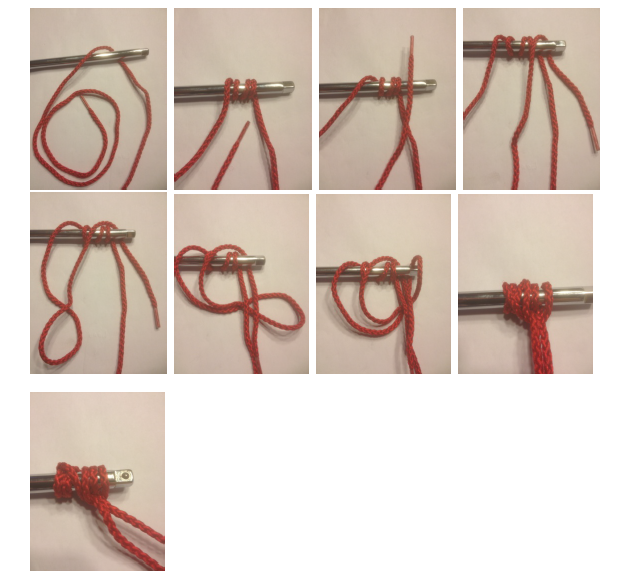
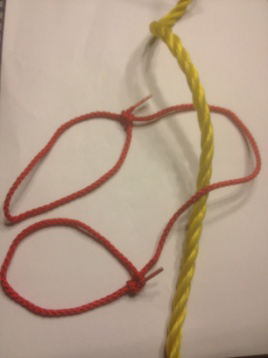
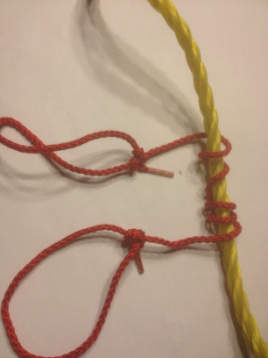
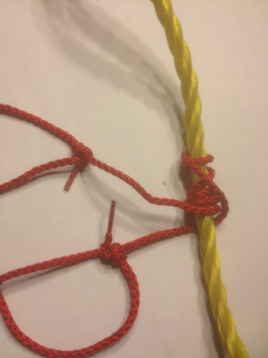
Icicle Hitch
The Icicle Hitch is almost identical to the Klemheist. The only difference is that the other knots are tied using a loop of rope
The Icicle Hitch can be tied by two methods. In addition to Dropping a Loop over the end of the pole, it can also be tied by Threading the End
The Icicle Hitch is used when force is applied parallel to a post or pole in only one direction. Advantages: The Icicle Hitch grips a smooth surface so well that it even works on a tapered surface such as a marlinespike – hence its name.
Wrap the rope around the pole four times moving away from the pole end. Leave a loop hanging and pass the end of the rope back over the pole alongside the standing end. Pass the loop behind both ends and hook it over the pole. Tighten the knot. The final load should be parallel to the pole.